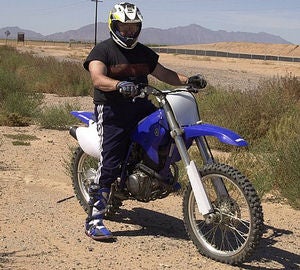
Now that we've put a lot of time, energy and parts into our two Project Dirtbikes, some very different personalities have emerged. Remember, this is a modified bike comparison. Our goal was to take two very popular trail bikes and make them a bunch better.
Not everyone wants to spend $7,500 on a new fussy four-stroke motorcycle, especially one that needs a rebuild every 30 hours or so. We started with the Honda CRF230F and later on, due to an avalanche of mail, proceeded to work on a Yamaha TTR-230R. Both of these bikes are inexpensive, very reliable and parts are reasonable. The bikes have lower saddle heights than the fire-breathing motocrossers and have what might kindly be called "mellow" motors. That's another word for "slow."
We bought the Honda new (a 2005 model) for $3,000. The Yamaha, also a low-mileage 2005 bike, was purchased for $1,700. Yep, for about half the price of a new zoot-capri four-stroke, we ended up with two bikes.
The other thing we didn't want to do was spend a lot of money making the bikes better. Read the tests in most of the dirt bike magazines and they babble about $900 titanium mufflers and so forth. We didn't spend that much total in modifying each bike and ended up with much better machines than we started with.
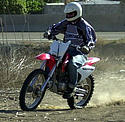
STOCK IMPRESSIONS
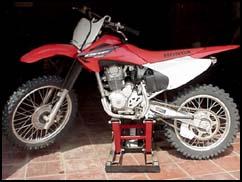 |
Completely stock Honda 230 |
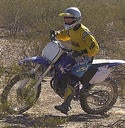
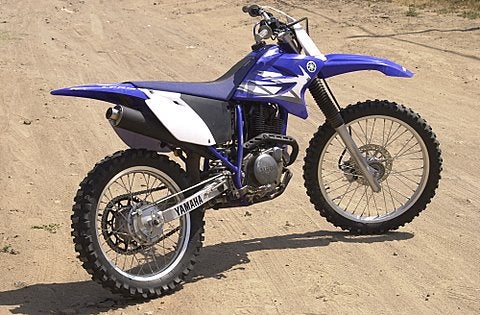 |
Completely stock Yamaha 230 |
Both bikes come with absurd gearing.You could almost walk alongside the bikes in low gear.The Honda was especially grim in low gear, with the throttle being ultra-sensitive, a beginning rider would find himself lurching off, instead of controlled acceleration.
Seat height is low on both bikes, with the Honda saddle being hard as a sheet of plywood.
One small note: the cheesy stickers on the tank of the Yamaha looked beat early and got worse quickly. The Honda stickers held up well.
Tires were below average on both bikes.
Rear suspension was poor on the Honda and even worse on the Yamaha.
Forks? Don't ask.
Of particular note was the rear brake on the Honda; it either didn't do much, or locked the wheel up. Detailing on the Honda was superior to the Yamaha.
The electric start of the bikes worked well, but the Honda was very cold blooded and you had to fiddle with the choke the keep it running until the bike warmed up properly.
Wait for it - this article has more pages....
MODIFICATIONS
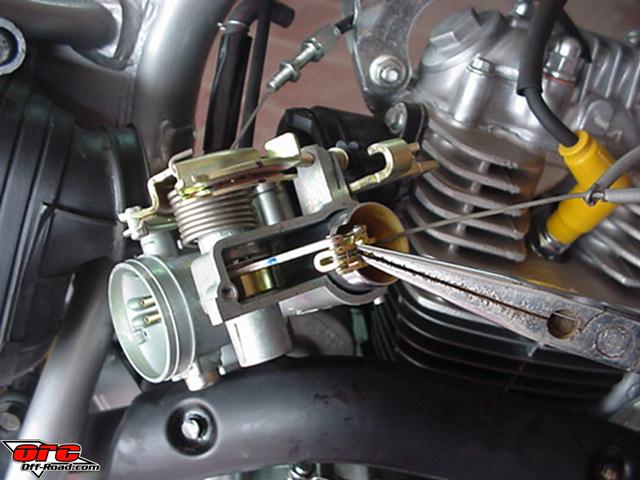 |
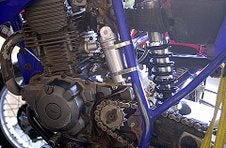
Getting into the carb on the Honda was a nightmare |
In part one of our Honda project, we let the CRF 230 breathe a bit by opening up the air box and exhaust, then installed the optional jetting. The cost was $37 for all the jets, and dollar for dollar, it was the most improvement that could be gained from the bike. It literally brought the bike alive.
Our first step was to uncork the 230 and let it breathe. This meant taking out the exhaust baffle and removing the highly restrictive inlet on top of the airbox. Warning: if you remove the exhaust baffle and the airbox restrictor without richening up the jetting, you stand a very real chance of smoking your engine due to an overly lean condition.
Power-up kit part #16012-KPS-921 (clip in middle position)
Pilot screw: Stock (5/8th turn out)
Standard Float level
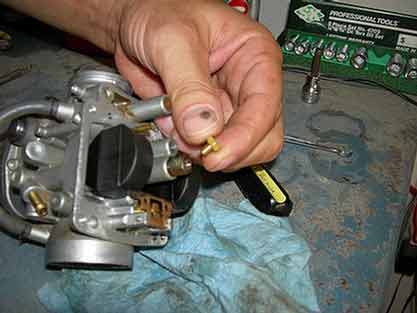 |
Working on the Yamaha carb was easier, but getting it off was a real hassle |
Modifying the carb on the Yamaha was a bit more complicated.With the carb removed, the float bowl is taken off and the stock main jet and pilot jet get replaced with the new brass. Stock, the main jet is a 125. This must be replaced with a #130 main. The number is Yamaha part no. 288143436500 or Mikuni part no. KN102221130.
Now comes the tricky part: Theres a brass plug on the bottom of the carb (near the inlet) that must be drilled out get to the adjuster buried under there. The brass plug is there to keep you from fiddling with the jetting, courtesy of the government of California. Since the bikes are all made in Brazil to California specs, all of them are made this way.
We drilled the brass plug out carefully with a inch drill bit, using ultra-light pressure, until the plug popped out and wrapped around the drill bit. After blowing the chips out, the adjuster was easily reachable with a small straight slot screwdriver. Bottom the adjuster out, the back off one full turn.For the pilot jet, the stocker is a #36. You should replace this with a #38 pilot. The Yamaha part no. is 43f-14342-19.
As with the Honda, we removed the highly restrictive parts on the air inlet and the exhaust on the Yamaha. On both bikes, the horsepower was greatly increased with the carb mods, yet the engines remained flexible and easy to ride.Why they dont come like this stock is beyond us.
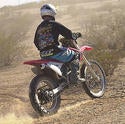
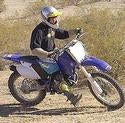
REAR SUSPENSION
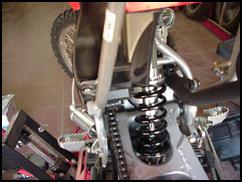
Finally, we got in gear and did something about the rear end of the Yamaha. With the increased horsepower, a good set of forks, solid tires and proper gearing, the bike was fun to ride except for that rear end. The stock shock was how shall we put it? wretched. It makes you wonder how people can truly enjoy even a casual trail ride with the harsh stroke.
 |
Works Performance shock on Yamaha 230 |
A Works Performance shock was installed and this made the bike completely different in that the bike, it felt much more stable. Big bumps were sucked up easily and smaller chatter bumps that used to drive the rider nuts were virtually ignored. Super shock and well worth the investment.
 |
Works shock on Honda 230 |
With the Honda, we also opted for a Works Performance shock. Two stages of tuning are available from Works Performance for the Honda CRF230F. Both the shocks available for this bike are mono-tube designs that incorporate Works' unique check ball, spring and orifice valving system.
This design allows the high, medium and low speed damping circuits to be modified independent of each other. The shocks are nitrogen charged and equipped with a bladder-style reservoir. They each feature threaded spring preload and 18-position rebound adjustment. The Pro Series shock also has 22-position adjustable compression.
Because of the linkage design and packaging requirements, the shock design allows a modest increase in travel from 8.6-inches (actual travel) to 9.2-inches. The shocks are also equipped with an adjustable length feature that allows the ride height to be raised or lowered without changing the spring pre-load. This is referred to as adjustable ride height.
After bolting the new shock (we used the adjustable Pro Series) on, the bike was taken for a ride. The difference in the action of the rear end was incredible! Since I weigh around 200 pounds, the stock shock was near its limits even under casual riding conditions. Lest you think that lighter riders would be happy with the stock shock, be aware that my old buddy Tom bought a new CRF 230 and was griping about the stock rear suspension. He weighs about 150.
The amazing thing was that I never made any pre-load, or damping adjustments before I rode the bike, and I don't think I'll do any until I need them. Rather than spending money on all sorts of sticker kits and light weight goodies, the shock swap is a must if you want a decent bike.
FRONT SUSPENSION
 |
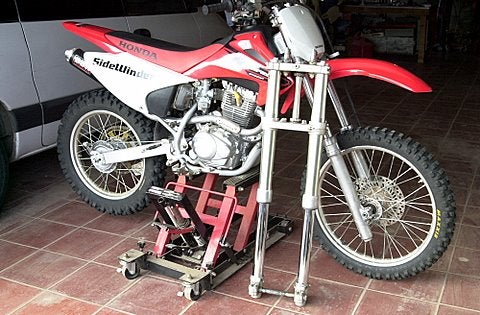
Honda 230 with upside-down forks installed. |
With the rear end working properly, the shortcomings of the front end became apparent. On the Honda, we first installed a conventional set of forks and were quite satisfied with them.
After spacers were installed, the bottom steering head bearing was pressed in place. The stem was then slipped in the steering head.
When the forks were reassembled, the top plastic spacers were left out so the forks would settle a bit. Stock, the 230 forks offer about 9 inches of travel and the new forks cough up a bit over 11 inches, so getting them to sag is a good thing.
Oil was added six inches from the top, springs out, forks compressed.
 |
The Honda got USD forks installed after we tried conventional forks. |
The stock brake hose was then clamped into place and everything was buttoned up. When we rode the bike, it was hard to hide the big grin! Those forks worked for us, first time out. Weight? The 43 mm forks weighed 9.9 pounds each side, while the 230 forks were 9.0 pounds even. When you consider that that 230 had steel triple clamps and the CR 250 clamps were aluminum, the total weight gain was about a pound, a small price to pay for forks that are worlds stronger and a whole lot better.
Eventually, we went to upside-down forks on the Honda, but quite frankly, the first forks we used were just fine and we could live comfortably with those.We didn't spend a lot of money on those first forks, as a complete set with triple clamps cost only $125.
Naturally, the Yamaha got fresh forks.We went right to upside-down forks on the TTR230 and found a clean set for about a hundred bucks on ebay that just needed fresh fork seals. The larger forks and triple clamps did not interfere with the steering in any way. That's right, there was plenty of clearance between the gas tank and the forks, even at full lock. No modifications were needed.
The stock TTR230 fender bolted right on the YZF250 triple clamps; the mounting holes were identical. With the new forks installed, we took the bike for a test ride.Small ripples and undulations in the terrain were virtually ignored, where the stock TTR230 front end wavered and shimmied over the same stuff. Big plus. In soft sand, the bike went straight and true, with no head shake or hunting. Another big plus.
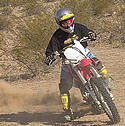
GEARING
 |
Both bikes received two teeth larger countershaft sprockets, lighter rear gearing and a good chain courtesy of Sidewinder. |
We mentioned earlier that the stock gearing on both bikes was a joke. Courtesy of Sidewinder sprockets, we opted for a 15 countershaft instead of the stock 13 and found a world of difference in performance. First, we tried a 14 tooth countershaft sprocket, then the 15 tooth item. The 14 tooth c/s really helped and the spread of power was longer and more usable in each gear.
Low was still low too low. A 15 tooth was then tried and this was just about perfect. Top speed was increased by about ten miles per hour and the spread of power was a pure joy! No kidding, the change makes that much difference.
If you're strangling your bike with the stock gearing, or are one of those poor souls who have put a smaller c/s sprocket on, then you owe it to yourself to try a 15. Your eyes will be yanked open and you'll realize just how much potential your 230 has.
DETAILS
 |
An average-sized rider (5' 9" or less) could put feet flat on ground with either bike. |
While we truly liked our Honda and what it had become, there was still something that bothered us about it a great deal. You see, the Honda has a "lurch" right off of idle that drives you nuts at low rpm in the bottom two gears. Let's try to describe that "lurch" to you. In first or second gear at low speeds, when you try to roll the throttle on, you get an immediate response that's hard to control. This is exactly the kind of thing you don't need when trail riding on tight trails. When you consider that the CRF230 is designed for beginning riders, or people who want a mellow trail bike, this is confusing. Imagine, if you will, trying to teach a 14 year-old kid to ride on a 230 and having a burst of power right off idle that scares the poor kid.
The cure was simple: we lowered the clip one notch and this raised the needle, making the transition from low rpm to mid-range smoother. Then a richer pilot jet was installed. To finalize the carb tuning, a small spring was installed on the "pull" cable. Once the spring was installed, the difference in the throttle response was incredible. The combination of the richer pilot jet, the change in jetting and the throttle spring yielded a decent throttle response. The "lurch" was almost gone. Our guess-timate was that we had an 85 percent improvement.
That bogus rear brake on the Honda was irritating. We located a CR250 rear wheel for $75 on ebay and it fit in easily.With some mods to the brake pedal, we ended up with a full-floater rear brake that worked just fine.
On the Yamaha, we noted that the side panels were flimsy and cracked easily.Also, the blue on the fenders and tank scratched and looked real bad.
Both bikes have irritating push/pull throttles and it takes forever to get to the carbs for servicing and jetting changes.
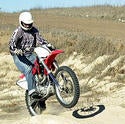
ALL THINGS CONSIDERED
So which bike is the one to have?
Bottom line is that the Yamaha is easier to ride with a much friendlier power delivery. The Honda is snappier and harder to ride. If you're going to ride in tight woods (enduro stuff), the Yamaha is the way to go. For a long trail ride like Baja, the Yamaha will consume a lot less energy from the rider. Beginning/learner riders will find the Yamaha a bunch easier to ride.When you get tired, you'll be happier riding the Yamaha. If you have some experience racing motocross, youll be happier with the Honda.
With good forks up front and Works Performance shocks at the rear, the suspensions on either leave little to be desired. Putting good tires on the bikes really helped the cornering habits.We feel that both bikes, when modified like we did, are now desirable.With time though, the Yamaha will start to look a lot older than the Honda.
Fortunately, both the Honda and the Yamaha now reside in our garage, ready to trail ride at any time, any place.
 |
 |
 |
 |
 |
 |
 |
 |
 |
 |
 Your Privacy Choices